Sunday, October 31, 2010

Happy Halloween!

I hope everyone in blog land had a wonderfully spooky Halloween.  I know I did. Ty & I both were surprised at how well the decorations turned out and as he said "We had a very successful Halloween".  How sweet of him to say.

Here's a quick breakdown on how I carved my second pumpkin. 
I chose this crow design.
(I had a hard time picking my second design.  I loved my bats so much!)

Of course there were a few things to change. First, I knew those branches were going to be close to impossible to cut, so I made them thicker and less gnarled. Second I had to create a circle around the bird that it could live in. Third I had to connect a few spots of the bird into the circle or else it wouldn't stand up!

Here's my stencil on my pumpkin.  To get to this point, check out the first few steps from Pumpkin Carving 101.  Because this second pumpkin was larger, I used my spoon to scrape away extra flesh from the inside of the pumpkin to make it thinner and easier to carve!


Once I poked the holes, I removed the stencil and got carving!


Here are pictures of my house and my pumpkins!  My neighbours even commented on our decorations.  I think the flock of bats and music we had playing really put things over the top!  One of my neighbours saw me putting up the bats (cut out from scrap booking paper) and asked how I did it....I replied "just cut them out and hung them with string and scotch tape."  Easy and effective.  Ty even saw strangers (trick or treaters parents) taking pictures of our pumpkins!  That made me especially proud! 


Friday, October 29, 2010

Pumpkin Carving 101

Carving a pumpkin is a super fun and traditional way to enjoy Halloween.  For me carving pumpkins is twofold- 1). hopefully my awesome pumpkins will invoke envy among my neighbours and trick or treaters, 2). I LOVE PUMPKIN SEEDS!!!!

So today I will take you step by step to carve a batty pumpkin.

STEP 1 - Purchase
Ensure it sits nice and flat and try to imagine where you will place the image on the pumpkin before buying it!  Try to find a pumpkin with some stem, so that you can easily lift and carry your pumpkin. 

STEP 2 - Prep Work
Clean/wash your pumpkin if necessary.  Just a damp paper towel to take off the dirt will leave you with a beautiful orange pumpkin.


 STEP 3 - Tools
YOU DO NOT NEED A FANCY PUMPKIN CARVING SET!  I used a sharp paring knife and a sharp chef's knife and a large metal spoon.  I highly recommend sharpening your knives before carving.  A sharp knife is a safe knife! You'll also need your stencil, a pair of scissors, scotch tape and something to poke with like a mechanical pencil with no lead, or a fine tip pen that is out of ink!


STEP 4 - There's a hole
With your Chef's knife, insert the blade into the top of the pumpkin at an angle, about and inch out from the stem.  Carefully cut a in a circle around the stem, always at and angle.  You may have to go around this cut more than once.  Once this cut circle starts to lift, try to pull it up by the stem.  Now you have a lid for your pumpkin!


STEP 5 - Clean and gut your pumpkin
It's time to get your hands dirty.  Yes you can use a spoon or ladle, but I like to get right in there.  I pull up handfuls of pumpkin flesh and separate out the seeds.  I place the seeds in a bowl and the flesh on the newspaper.  Once I've taken out all the goop, then I go in with a big spoon and scrape the pumpkin's inside to ensure a clean  finish!  I will also make adjustments to the hole to make it a bit bigger by cutting (not on an angle) away some of the flesh at the top.


STEP 6 - Pattern Perforation Perfection
(I like alliteration)  Now it's time to tape your pattern/stencil to the pumpkin.  Before you do, at the corners of the paper cut on an angle from the corner toward the center.  This will allow you to curve your pattern so it lays flatter on the round pumpkin.  Tape the pattern to the pumpkin where you want to place the image.  With your pen or pencil, poke holes along the lines of the pattern.  Be sure to make a hole on corners or ends of lines!  Poking eliminated black lines on the final product, and creates a guide that allows for a few knife slips here and there :)


STEP 7 - I will cut you
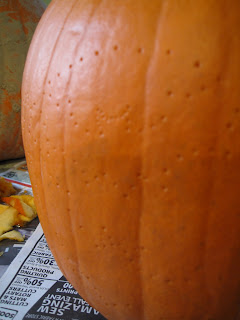
Not you, the pumpkin.  Take the pattern off the pumpkin and you'll end up with something like this.  Glasses wearers, you might want to put those bad boys on.....

Now with your paring knife, connect your pokes with cut lines (all the way thru the pumpkin).  Start on a small area, like the top of the pattern.  You are cutting away the 'background'.  The bats will become silhouettes once the rest is cut away.  Don't be afraid to be purposeful.  This isn't like cutting a radish rosette.  use those muscles, and don't worry if you look a little maniacal, stabbing away at the pumpkin!  Just close the blinds so your neighbours don't think you're totally unhinged!


As you finish one section at a time, it's time to punch out the negative space that will make the image come alive!  Sometimes, depending on the size, you may have to make additional cuts in the pieces you want to push out (its fine!).  This will allow you to eliminate smaller pieces and be less likely to break the design.  You will feel, as you get to the end of your carving, that the pumpkin becomes less stable, and the image is delicate and could break.  Be careful.  You can always use toothpicks to prop up any pieces that may have broke!


Finished product.  I will post a lit picture for full effect on Halloween! 
Stay tuned for Carving 201, which will be a harder stencil.  Same process.


LINKING UP TO...


Pre Halloween Prep

OK, for someone as adverse to Halloween as I am, you might not believe it when you look at my house.  I wanted to make sure kids knew that we were participating in Halloween, so I thought I would decorate our house a bit....that's the fun-ness of having a house-I CAN DECORATE THE OUTSIDE!  Plus I mostly love decorating/themes, so I'm finally getting into the Halloween spirit. 

I bought my pumpkins today!
DIRTY!

See how big they are!  I put that soup can there for reference!


I spooked-out the front of my house!  My theme is spiders and bats.   Spooky, but not scary for the little ones.


  I will definitely take pictures of the final product, complete with carved pumpkins!

And most importantly I made a Halloween Hit Mix.  I think the dancer/choreographer/producer/director in me comes out at Halloween, because I feel that music can create a mood that is unparalleled to anything else....well, except someone jumping out of a coffin on their front yard-which DEFINITELY happened in my neighbourhood when I was a kid! 
Not impressed!

Here's what Trick-or-Treaters will be hearing when they come to my house in no particular order
I will be editing these songs in Adobe Audition and creating one long party mix with Halloween sound fx between songs for seamless transitions...

1). Thriller-Michael Jackson (DUH)
2). Monster Mash
3).Abracadabra-Steve Miller Band
4). Somebody's Watching Me-MJ &Rockwell
5).Ghostbusters Theme Song
7). Season of the Witch-Donovan
8). Night on Bald Mountain-Disney's Fantasia (Intrumental)
9).Adam's Family Theme Song
10). Harry Potter Theme Song (Instrumental)
11). This is Halloween-Nightmare Before Christmas
12).People Are Strange-The Doors
13).Boris the Spider-The Who
14). Dark Knight Theme Song (instrumental)
      (very Thriller-like-I highly recommend listening to it!)
16). Halloween Theme (SUPER CREEPY!!!)
17). Purple People Eater

Are there any important songs you think I've missed???

Sunday, October 17, 2010

Hallowe'en Party Pooper

Yup.  That's me.  I don't like Halloween.  Please don't all storm out at once!  I can't describe it, I can't explain it, I just don't get excited about Halloween.  Dressing up never was a big deal, since my WHOLE life I've been dressing up in dance costumes, usually multiple costumes in one night!  I also don't have kids, so that may be part of why I don't get excited-but I know plenty of grown ups (or almost grown ups) who still love Halloween.  It doesn't help that I don't like to be scared-horror movies are NOT my idea of entertainment!  I do like free candy though; but my favourite part about Halloween is carving pumpkins and roasting pumpkin seeds.  It's something my family did annually, so it holds a special place in my heart. 

Which is why this year I am SO excited since I actually have a house, with a front porch where I can put my carved pumpkins.  I also finally live in a neighbourhood with kids, so hopefully Ty & I don't eat all the candy we buy this year!

I'm trying to pick my patterns for my pumpkins,
and I found some AMAZING ideas. 

I don't like Twilight but this is impressive. Robert Pattinson-still hot even in squash form 

TOO FUNNY!!!!!
PS will definitely be watching "Sarah Palin's Alaska"
on TLC. Ridic!

I really like these for classic pumpkins.  A scary one and one that kids will like.  There's got to be a balance!


OK now this is just a work of art......


YES!!!!! Love it.  Too bad I am not America.  It might look weird for me to put this on my porch.  But how amazingly lifelike is this?!??! Crazy!


Team Jacob-just kidding, but not really. 
I like this one too, and I'm confident I could pull it off!

Simple and Effective-perfect! 


I think I HAVE to do this one!  Love the hoots!


This one might be tough but gorgeous!  I would do the Trick or Treat.  Happy Halloween is too long!


Classic bats.  Plus it reminds me of Batman...
...Christian Bale *drool*......

My Dad always used to carve our pumpkins, and not to brag, but kids and parents ALIKE used to comment on how great they are.  I hope I can live up to his reputation!  Actually, come to think about it my family was kinda great about Halloween.  One year we dressed up in a them as a family; I was Dorothy, my sister was the Tin Man, my Dad was the Scarecrow and my Mum (at home handing out candy) was the Wicked Witch of the West (we clearly hadn't gone down the yellow brick road far enough, because we hadn't met the lion!)

OK enough reminiscing.  Which pattern do you like best?  What are you planning on carving?  Or maybe you hadn't thought about it or have never done it before.  I will be posting my carving/tutorials in the upcoming posts so if you wanna learn, stay tuned!

Thursday, October 14, 2010

Tutus & Tarts

Usually on Thursday I participate in the lovely Alison's Recipe Swap Thursday.  However, I've been slightly pre-occupied with painting projects and out of town company to be bothered to cook lately.  However, I do have a a cooking oriented post today that I want to share with everyone.


Tutus & Tarts is a fundraising cookbook that is comprised of recipes from dancers, artistic directors and other dance community members from around the world!  The cookbook boasts over 150 recipes from people like Alex Wong (SYTYCD USA), Chan Hon Goh (former Principal dancer National Ballet of Canada), Jeff Hyslop (Phantom of the Opera Canadian Tour), Mark Morris (founder Mark Morris dance group), Paul Taylor (artistic director Paul Taylor Dance Company), Karen Kain (former principal dancer National Ballet of Canada), Twyla Tharp (internationally renowned choreographer).  It truly is a treat for foodies and dance lovers alike.  Not to mention a few of my favourite recipes are included as well!

Below are two press articles for more information


http://www.vancouversun.com/entertainment/Vancouver+Ballet+Society+twirls+global+cookbook/3670126/story.html


http://communities.canada.com/VANCOUVERSUN/blogs/cultureseen/archive/2010/09/24/twyla-tharp-in-tutus-amp-tarts-cookbook.aspx


I will admit this is my pet project.  I put A LOT of work into it and hope that people enjoy it.  I used Rasmussen Printers (Winnipeg MB Canada).  They are cookbook printers.  They were wonderful to deal with, helpful and made it very easy and cost efficient way to fund raise!

If you're interested in purchasing the cookbook, please feel free to leave me a comment or call my office 1-604-681-1525 or email my office vbs@telus.net The funds raised for sales of the cookbook will go toward the Vancouver Ballet Society to support its programs.  For more information about the Vancouver Ballet Society please check out their website http://www.vancouverballetsociety.ca/ 

Monday, October 11, 2010

Tag-I'm It!

Jill, aka my lil sis, over at Envirocraftiness tagged me in this fun game!  Because I am such a snoop and I like to know everything about everyone (I love researching!) I really like this game.  So if I tag you please try to be a good sport!  And if you don't want to play-well I guess that's OK!


This one's pretty easy. I answer the 8 questions Jill came up with, create 8 of my own, and tag 8 others to answer them!

1 What type of theme party would you want someone to throw you for your birthday?
Well I was actually thrown a pretty awesome 20th surprise birthday by my girlfriends when I was at college.  It was hockey themed, and they all got t-shirts with numbers on them and their nicknames across the back.  Mine had the #20 and said "Coach".  It was very sweet.  One of my g-friends even blacked out one of her teeth!  Now that's commitment :)  But now I would want a Mexican themed ( i LOVE tequila) or Carnavale themed (I love those masks!) or maybe a 1920's/1930's theme ( I like big band music).  In all fairness any party I don't have to plan would be nice!


2 How many (if any) siblings do you have, and what is your favorite childhood memory with them?
I have one sister, and she is younger than I am.  Jill and I have A LOT of great memories together involving hot coffee, tongues frozen to poles, wrestling, playing Barbies etc etc.  But one of my favourite memories is of Jill & I freezing our buns off in the Saskatchewan winter, outside our local hockey rink waiting for our Dad to come and give our car a boost.  See in Saskatchewan it gets to -40 CELSIUS!  We were at the hockey and our Dad had told us to turn the car on and let it run during intermission.  Well, why would we do that, when we could walk around the rink and follow the cute hockey boys in suits who weren't playing?  Needless to say, our car didn't start after the game and our Dad sure didn't like the fact that we hadn't listened to his advice and had to come out and boost us.  There is a picture we took in the car where we are holding our noses because we are so cold.  When I find it, I'll post it.  It's very cute!
 

3 If you were a fruit, what would you be and why?
Hmmmm, I have never thought about that before.  I think I would be a pineapple, because they are my favourite fruit!  Plus they can double as a glass for a yummy tropical rum based drink-which I also like!  They're also deceiving, and I like to think I'm a little bit deceiving?  Maybe not :)


4 Who would play you in a movie of your life?
Who do you say without sounding super conceited?  I have 3 choices I think. First is Julia Roberts, only because I love her and have loved her forever, but she really doesn't look like me.  Second would be Sandra Bullock.  She is closer in the looks department and the mannerisms ( I sometimes snort when I laugh) but she's still not quite right.  I think the best choice would be Lauren Graham (Gilmore Girls, Parenthood).  My sister in law thinks that I look like Lauren Graham in my grad photo (in B&W on my sidebar).


5 Sweet or Salty? 
I would have to say salty, because if you put a bag of chips and a piece of cake in front of me I would pick the bag of chips about 95% of the time!  I also don't really like cake....


6 What do you wish you could tell your ten year ago self?
Hmmm, my ten year old self?  I would have told her that it was OK to have fun.  I was a cautious kid, I never really liked to get into trouble ( I still don't).  I also might have told her not to be so boy crazy, because all the boys she liked didn't like her that way and that it didn't matter because in 10 years she would find the man she would be with for the rest of her life.  I could've saved A LOT of time pining away for boys who weren't right for me!


7 Do you eat corn (think niblets) with dinner as a starch (ie potato, pasta, etc) or as a vegetable (ie carrots, green beans, peas)? I"m asking because my best friend and I disagree on the matter! lol
Even though corn has a lot of starch (and sugar) in it, I DO NOT consider it a starch.  A perfect example was yesterday's Thanksgiving dinner at my house.  We had potatoes, yams and corn for our vegetable.  It really cannot be a substitute! Sorry Amy :) LOL

8 If you could live in a past era which would it be?
This is REALLY hard because there are alot of eras I would've like to live in. 


Let's start with the earliest and say Tudor/Elizabethan England (Yes I know they span several decades, bloody decades at that but I like that whole story arc).  I am OBSESSED about this time period.  I think it's enthralling (History Nerd Alert!) I read historical fiction books in this time period.  If you like this era too check out the books my Phillipa Gregory-I have listed my favourite books by her on my side bar!  I also watch 'The Tudors' (which I HIGHLY HIGHLY recommend) and have seen both Elizabeth movies with Cate Blanchet, who I think is a great Elizabeth. (The mid to late 1700's-think Marie Antoinette- is also cool.  Except for the Revolution....that was sad)


Second I would like to live in the 1930's because I love the fashion, the emergence of art deco (emerging in the 1920's growing in the 30's), society and culture are growing by leaps and bounds, you're moving out of the Big Band era and into jazz (2 styles of music I adore) and it just reminds me of New York City, and when it really became 'the place to be'.  Plus don't you want to wear that hat!?!?

Lastly I would have liked to live in the 1950's/1960's.  I love the Mad Men craze that's hip right now.  I love the idea of being a housewife (maybe because I grew up when a lot of women were going back to work?)  I like the Americana, 'small town America' that grew out of these decades.  I love the advertising, I love that women wore dresses and gloves, I love the etiquette (complete with backstage gossiping, whispering and being an overall snoopy lousy neighbour!)  The stereotype of North America in the 1950/1960's is so cliche it's actually hip?  I also love the potential everyone felt.  The idea that you could be whoever you wanted to be and do whatever you put your mind to. 


Here are my 8 questions

1).  What is 1 thing on your 'Bucket List' & what is holding you back from doing it rightnow?
2).  What is your go-to feel better remedy and why does it work?
3).  What is your guilty pleasure television show?
4). What comfort food do you crave most when you visit family?
5).  Who can cheer you up best, even when you're in the WORST mood and how? 
6).  If you could trade lives with ANYONE in the world, living or dead, who would it be and why?
7).  If money was no object, how do you envision your dream house and where is it?
8).  What song is so special to you that everytime you hear it, regardless of where you are, you cry?

Here are the 7 lovely bloggers I'm tagging
Night Owl Crafting
Creations By Kara
 Blue Artichoke Interiors
 Ramblings & Photos by Ashley Sisk
The Painted Hive


I hope you've had fun reading my answers and getting al little glimpse into my life!


BIG REVEAL Part 2

First off I have to wish all my Canadian readers a very Happy Thanksgiving.  For anyone who is wondering what we Canadians are thankful for, we celebrate the harvest, as opposed to Americans who celebrate the pilgrims landing in America.  Saskatchewan (my home province, it's right in the middle.  It's a rectangle and is almost perfectly flat) is known as the 'Bread basket of the world'.  Agriculture is a dominant industry in Saskatchewan.  Anywho...

Thank you to everyone who gave me some love about my lovely new living room.  There is still some work to be done, but I will get to that later.  NOW, for what you've all been waiting for..... THE BIG REVEAL  part deux!


Well if you hadn't guessed, it is another home reno project.  And yes it does involve getting rid of another one of my blue rooms....you won't believe this transformation!


Here's what I started with


Yup more blue....even lighter than the living room.  At least the living room had some depth to it, this is barely blue.  I had conversations AT LENGTH with my Mum (who had seen the house in it original state) about how the brown cabinets, grey floor and white appliances and counter tops looked stoopid all together.  There was no cohesiveness, and the paint was NOT helping!  So I hummed and hawed and thought about my dream kitchen (which includes stainless steel appliances....*sigh* someday)  My idea scared some people when I asked them for advice...

Here's what I used


This was a solo project.  Meaning I did EVERYTHING, start to finish, by myself.  I did have a little bit of help from Ty, but not really enough to give much credit :)  He was supportive, and really that's all a gal needs!

Woo hoo! Priming-done.  Edging-almost done.....


Whoa!  One wall down....looking good!


Old versus new.  I hope you agree the new looks considerably better!


Around the window we go!


I HIGHLY recommend investing in a mini roller-ESPECIALLY for kitchens! 
There are so many little spaces to get in to!  It's so cute too!


I didn't want to paint the room in sections,
 but the kitchen couldn't be out of commission the WHOLE weekend!


More old versus new. 
Again I stopped short of the cooking area so I could still use my kitchen.


If you paint your ceiling (which I did repeatedly) a quick easy fix is to grab your edging brush and primer and spot treat your ceiling mark with primer.  Yes it is probably whiter than your ceiling, BUT it's better than a big daub of green on the ceiling! 
And really, no one is looking at the ceiling!


TA DA!
THE FINISHED PRODUCT


What do you think?  I LOVE it.  And yes, I know, a green kitchen IS NOT for everyone.  But as you can see my fruit bowl is green (on the island) and I have green bowls and green coffee mugs that accent my white dishes so everything ties together nicely I think.  I think my green kitchen is far superior to the blue kitchen.  "Better than the blue" has become my motto during these 'renos'. 

 I hope you have enjoyed the first 2 of many home update projects.  I also hope it inspires you to update your home.  Through this process I have learnt that you shouldn't be afraid of colour in your home-go with your gut, because you know what you like.  You can also paint a whole room in a weekend-it's not as time consuming as you think.  Map out your time and use it efficiently.  I also learnt that two are faster than one, so if you have a handy friend, see if you can exchange their painting skills for beer and pizza.  I know that would have made my kitchen come together A LOT faster!  But I am super proud that I made my kitchen one step closer to being my dream kitchen....now for those stainless steel appliances!

If you're curious to know what I used;
CIL Dulux 100% acrylic latex primer interior-White 2330 
Martha Stewart Living Base 2 Interior Latex Eggshell MSL2012 -Sultana 


Linking Up To: